

I've received numerous inquiries from physicians over the years regarding my experiences with medical animation development and cost given I've produced close to 30 animations thus far. Rather than going over the same materials each time I get a new inquiry, I wrote this blog article that addresses many of the questions I get.
INTRODUCTION
Medical animation is slowly becoming a more common way to educate patients, especially when a surgical procedure or medical concept is difficult for a patient to visualize and recording with a handheld camcorder is very difficult if not impossible to achieve. However, comparatively, it is a very expensive option but has the potential to provide huge returns both in terms of patients as well as social media views, especially when there is nothing else similar available.
There are essentially 4 types animations currently out there. There are both strengths and weaknesses for each animation type, but for the individual who will be paying for everything, cost is the main differentiator.
Some companies specialize in only one type of animation whereas others like O2Labz can accommodate any style.
Realistic 3D Animation - Very Expensive
This type of animation provides the wow factor and is akin to the CGI you would see in a hollywood blockbuster movie. Of course, you also pay orders of magnitude more. The rhinoplasty animation below is an example of 3D animation. Note that perspective is maintained even through different camera angles as well as realism of surface textures and appearances.
Semi-Realistic 3D Animation - Expensive
This type of animation is still 3D, but realism is sacrificed in order to save on cost.
Hybrid Animation - Less Expensive
This type of video incorporates live video and utilizes animation only where live video-recording is very difficult, if not impossible to perform. Other situations where hybrid animation is produced is when additional information is needed in order to clarify what is happening.
Additional examples of hybrid animation can be watched:
• Breastfeeding Ultrasound
• Half-Somersault Maneuver to Treat BPPV Vertigo
2D Animation - Less Expensive
Note that the animation is much more cartoonish in appearance. Also note that only a single camera angle is used at all times.
Whiteboard Animation (aka, Explainer Videos) - Least Expensive
Typically, animation is in black and white, though elements of color can be added. Movement is also limited in nature.
HOW TO MINIMIZE COST
Although others may follow a different plan, the steps that I take to make the best possible animation with the least amount of money are as follows.
1. Create a VERY detailed storyboard. The storyboard is basically making a cartoon that describes what the scene will look like, lighting, camera angle, camera zoom, and duration every single moment of the imagined animation from start to finish. For example,
"At 0 seconds, start out showing the front of a woman's face filling the screen. The background is a light grey. Lighting is diffuse and even. Over the next 5 seconds, slowly zoom into the woman's face such that the nose fills 75% of the screen. Once zoomed in, over the next 3 seconds, turn the camera angle 30 degrees to the left such that the side of the nose is centered."
The storyboard should include reference illustrations and videos to try and explain to illustrator what you envision. I typically get such reference images from Google Images, YouTube, and textbooks.
Cut out anything that is not necessary since every additional second/minute adds significantly to the cost.
2. Based on the storyboard, decide which type of animation style would work best at conveying the information you have. Although 3D animation for everything would be great if you have an unlimited budget, it is not always technically necessary. For example, I decided on 2D animation to describe how allergy vials are made above as 3D really would not have added to the information I was trying to convey. However, for the rhinoplasty video, 3D was extremely important as nasal appearance in all dimensions is something patients like to see as it may be hard to visualize such information in 2D only.
Once you pick an animator, work can begin, but here's a few things to keep in mind to prevent surprise expenses and minimize annoying your animator.
• ALWAYS respond promptly to questions. The animator can not continue working on the animation without constant feedback and approval to go on to the next step in the storyboard. If it takes 24 hours for you to respond, the animator will have to wait 24 hours before continuing to work on your animation. This wastes their time.
• Have the animator create still shots of storyboard scenes first for your approval before they animate anything.
• When animation finally created, keep the amount of detail to a minimum initially. Make sure that the camera angles, sequence of events, zoom, etc are all looking good first. Once draft animation approved, final animation with full rendering of textures and details can be produced as the last step. Why? Because it takes time for a computer to create the movie with full detail whereas "draft" animations can be produced quickly.
• Try to avoid requesting changes AFTER you have already approved something. The biggest faux pas is to request a change after you have already approved of an animation sequence. Why? Because even a small insignificant change may require the animator HOURS of work to implement. To use an analogy, it's like a homeowner asking a builder to make the basement slightly bigger after the first and second floors have already been built. Or deciding to change the color of a yarn pattern after the sweater has already been knit.
If you request changes after initially approving something, you might be charged extra for additional work that needs to be redone. Most animators will forgive one or two such changes, but WILL charge extra if you keep making changes beyond that.
Typically, the animator is paid in thirds: 1/3 of the project cost immediately or after stills approved; 1/3 after first animation draft; and 1/3 after project completion.
FINALLY...
Once an animator has created something for you... additional animations based on the same model can be made for much less. For example, using the same nasal hump rhinoplasty model above, I was able to create a different rhinoplasty video shown below for significantly less.
I also would not worry about how fast or slow the animation is in certain scenes. That's something you can easily change in any video editing program like iMovie or Final Cut Pro X (which I use). No need to pay an animator to do this. Needless to say, you can save money by doing things yourself where you can. This includes narration, background music, title screens, credit screens, etc.
Just FYI, copyright free background music and sound effects are available through YouTube's Creative Studio.
I personally ALWAYS credit the animator in videos I publish because I feel it is the right thing to do. But when negotiating cost with an animator, do NOT bother to ask for a discount if you provide such credit. Providing credit is not a particularly big carrot for animators because there's no guarantee that your video will actually be popular enough to warrant giving you a discount. Perhaps if you have already established a track record for creating popular videos, the animator might provide a small discount, but don't count on it.
For those curious, the animation company I have worked most extensively with is O2Labz.
Types of Medical Animations and Cost Implications

You might be interested in reading...
 07/03/2013 - 1 CommentsI made a nosebleed video a few years ago that was roundly criticized for being poorly made. The…
 11/13/2012 - 35 CommentsEustachian tube dysfunction is a phenomenon whereby a person is unable to pop their ears to…
 03/12/2023 - 0 CommentsIt is impossible in real life to create a time lapse photo sequence…
 01/18/2011 - 0 CommentsDr. Chang was recently invited to become a regular contributing author to Better Health and its syndicate…
 10/29/2011 - 0 CommentsAt least that's what the LA Times reported on Oct 28, 2011. And supposedly will be having surgery to…
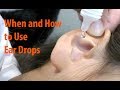 06/23/2018 - 0 CommentsGiven antibiotic ear drops are one of the more common prescriptions ENT doctors prescribe, this video…
 10/29/2014 - 0 CommentsAnybody who has undergone an MRI scan can tell you that other than the claustrophobia of being in an…
 12/22/2017 - 0 CommentsTable from this Reference Contrary to common belief, normal nasal fluid is not water... It is in fact more…
No comments:
CLICK to Post a Comment